
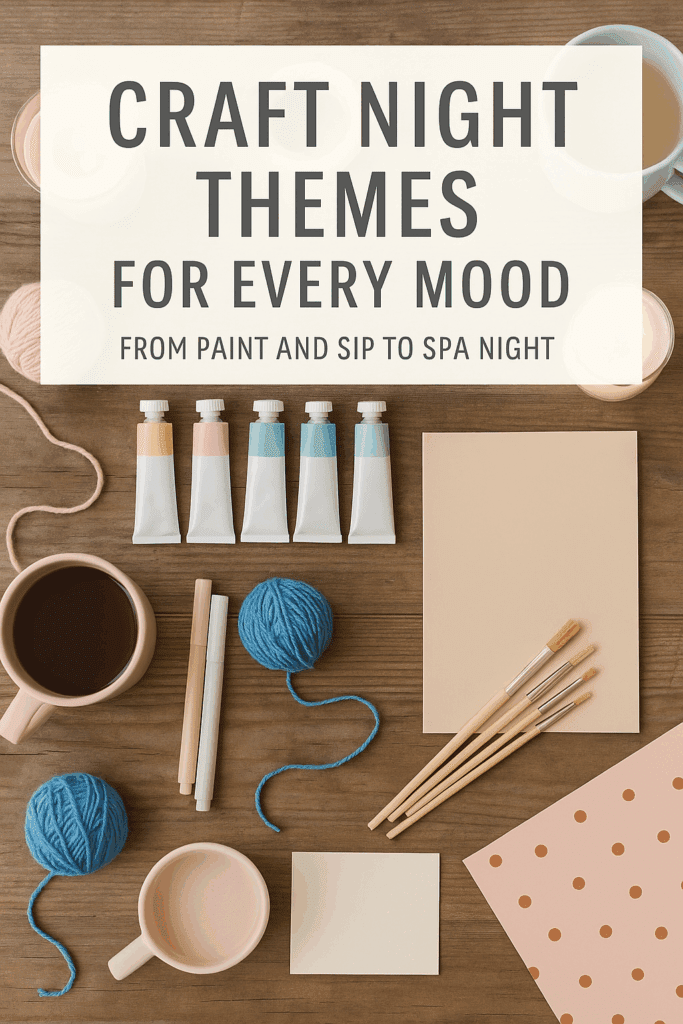
If you’ve been searching for fun craft night ideas for beginners, you’re in the right place. This guide walks you through exactly what to do, what to bring, and how to host a fun, stress-free craft night everyone will love — even if you’re not crafty at all.
Whether you’re planning a girls’ night, a cozy date, or a “let’s actually make something” evening with friends, these craft night ideas for beginners make it easy to plan an unforgettable get-together without the stress.
This all-in-one guide covers everything — from choosing a theme to what to buy (and what to skip), plus a realistic timeline, setup plan, and troubleshooting for common hiccups. Bookmark it now and reuse it every time you host your next craft night.
1) Choose Your Vibe (a.k.a. Theme Without the Pressure)
Pick one simple direction so guests know what to expect:
- Decorate-Something Night (mugs, tote bags, picture frames, notebooks)
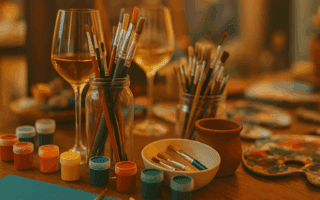
Beginner-proof, low mess, instant gratification. - Paint & Sip (pre-sketched canvases, watercolor postcards)
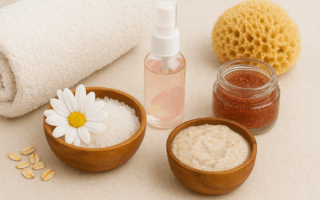
Relaxing; mistakes look artsy. - Self-Care Crafts (candles, sugar scrubs, bath salts, vision boards)
Smells amazing, doubles as gifts. - Paper Play (card-making, origami, paper flowers)
Budget-friendly, kid-safe scissors, easy cleanup. - Seasonal/Holiday (ornaments, pumpkins, valentines, summer shells)
Built-in excitement and photo moments.
Pro tip: Choose projects that don’t require drying time between steps or precise measurements. If you’re unsure, go with decorate-something night.
2) How Many People? (The Goldilocks Rule)
- 2–4 people: intimate, plenty of space, one shared supply kit is fine.
- 5–8 people: sweet spot for energy; plan duplicate tools (2–3 glue guns, multiple scissors).
- 9–12+ people: keep the craft extremely simple, or split into two tables/stations.
Space test: Can everyone sit with a forearm’s worth of elbow room? If yes, your group size works.
3) Budget Breakdown (and What You Can Skip)
A realistic starter budget for 6 people:
- Core supplies: $25–40 (glue sticks, tape, brushes/markers, wipes, table cover)
- Project materials: $30–60 (bulk blanks like mugs/totes/frames, paints/decals)
- Snacks & drinks: $20–40 (keep it simple—chips + cookies + seltzer)
Total: ~$75–$140 (≈ $12–$23 per person)
Ways to reduce cost
- Ask guests to bring one item (a set of markers, stickers, ribbon, or a snack).
- Shop multi-packs and split.
- Choose crafts that use household items (old jars, magazines, cardboard, fabric scraps).
- Keep décor minimal: a clean table + candles/fairy lights = instant mood.
4) The No-Panic Shopping List (Beginner Base Kit)
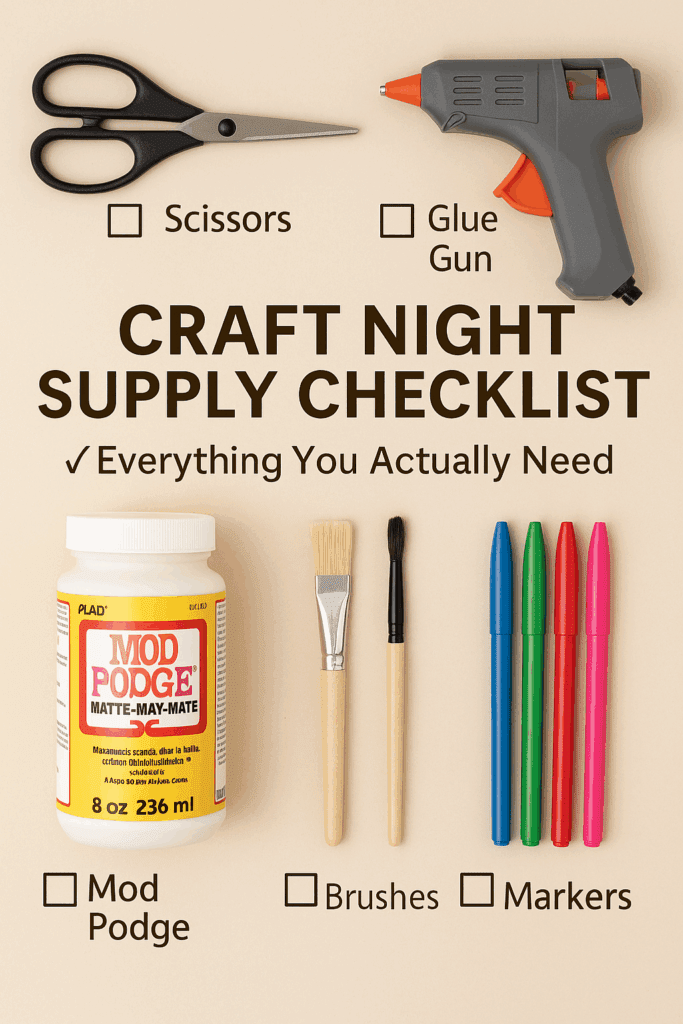
Use this for almost any theme:
Surfaces & protection
- Plastic or kraft paper table cover
- Paper plates (as paint palettes) + paper cups (rinse water)
- Paper towels + baby wipes (for hands/tools)
Cutting & sticking
- 2–3 pairs of adult scissors
- Washi tape and clear tape
- Glue sticks + 1–2 mini hot glue guns + extra glue sticks
Mark & paint
- Permanent markers (fine + bold)
- Acrylic paint basics (white, black, primary colors) or paint pens
- 10–12 mixed brushes (cheap set)
Finishing & extras
- Mod Podge or clear-dry craft glue
- Ruler, pencil, eraser
- Trash bag, small recycling bin
Project-specific blanks (choose one):
- 6–8 plain mugs or
- 6–8 canvas tote bags or
- 6–8 small wood frames/canvases or
- Watercolor postcard pads
Allergies & sensitivities: Choose low-odor glues/markers and open a window if using sprays or hot glue.
5) A Realistic Timeline (Copy & Tweak)
One week before
- Pick your theme and project.
- Send invite with: start time, end time, what to bring, and any clothing note (e.g., “comfy clothes you don’t mind getting paint on”).
- Order/buy blanks and any special supplies.
Two–three days before
- Inventory what you already have (scissors, markers, jars).
- Buy snacks, drinks, table cover, wipes, trash bags.
- Create a playlist (chill, upbeat, no lyrics if you want conversation).
Day of (60–90 minutes before)
- Clear a flat surface; cover the table.
- Lay out tools in little stations (markers in one basket, brushes in a jar, glue sticks in a bowl).
- Pre-portion paints or supplies onto plates/containers.
- Set up a drying zone (empty shelf, windowsill, or second table).
- Put snacks on a separate surface (keep food away from paint/glue).
When guests arrive (10 minutes)
- Quick welcome: show projects on the table, hold up a finished sample or photo, and explain the plan in 3 sentences:
- “We’re decorating mugs/totes/frames.”
- “Everything’s here—pick colors and go.”
- “Dry finished pieces on that shelf; we’ll take a group photo at the end.”
During
- Keep the vibe light; circulate with wipes, scissors, and encouragement.
- Play “show & tell” halftime to spark ideas.
Wrap-up (15 minutes)
- Group photo with finished crafts.
- Write names on painter’s tape and stick to each project while drying.
- Quick tidy: trash, wipes, stack tools in one bin.
6) Table Map (So It Flows)
Center: shared tools (scissors, markers, brushes in jars).
Left end: glues/tapes (keep hot glue far from snack zone).
Right end: paints/Mod Podge + plates/paper towels.
Top edge: basket for finished/semi-wet items → Drying zone nearby.
Separate surface: snacks & drinks; napkins; hand sanitizer.
If space is tight, set up two mini stations with duplicates of the most-used tools.
7) Hosting Etiquette (So No One Feels Awkward)
- Set the tone: “This isn’t art class. Imperfect = charming.”
- No skill flexing: Compliment effort, not perfection.
- No pressure to finish: Let people take pieces home to complete.
- Accessibility check: Offer a chair with back support; provide non-scented options.
- Mess management: Aprons or oversized tees; wipes within reach.
- Photo consent: Ask once before posting group pics.
8) Food & Drinks That Actually Work
- Low-mess snacks: pretzels, veggie sticks, bite-size cookies, popcorn.
- Easy drinks: seltzers, lemonade, a signature mocktail; if serving wine, keep cups with lids or pour lightly.
- Avoid: powdery snacks (Cheetos dust + wet paint = tears), frosting cupcakes near the craft table, red wine next to white totes.
9) Quick Theme Menus (Pair Craft + Snack + Playlist)
- Paint & Sip: pre-sketched canvases + flatbread/pizza + mellow indie.
- Mug Decorating: ceramic markers + tea bar + acoustic coffeehouse.
- Self-Care Night: sugar scrubs/candle tins + fruit, chocolate + spa/instrumental.
- Paper Party: card-making + charcuterie-style crackers/cheese + light pop.
10) Troubleshooting (Read This Once, Save Yourself Later)
- Glue gun traffic jam: Have 2+ guns; create a “glue zone” so cords stay put.
- Paint won’t dry: Keep a small fan on low aimed at the drying area.
- Markers bleeding on fabric: Put cardboard inside totes/shirts and use fabric paint pens.
- Someone hates their project: Offer neutral add-ons (ribbon, washi tape, a fresh blank).
- Supply runs short: Start a “share & swap” bowl in the center; remind everyone to return shared items.
- Spills: Dab with baby wipes immediately; keep stain remover pen nearby.
- Kids/tweens attending: Swap hot glue for tacky glue; pre-cut tricky pieces; shorten to 60–75 minutes.
11) Clean-Up That Doesn’t Wreck Your Night
- Keep a trash bag clipped to the table edge.
- Toss plates/palettes as you go.
- Soak brushes in a cup of water, then wash as a batch.
- Roll up the table cover with crumbs and scraps inside—instant sweep.
- Store leftover supplies in one clear bin labeled “Craft Night Kit.”
12) What to Bring (Copy-Paste for Your Invite)
Guests bring:
- Comfy clothes you don’t mind getting paint on
- Optional: favorite stickers/ribbon/markers to share
- A snack or drink to add to the table
- A tote bag or container to carry home a drying project
Host provides:
- Table cover, wipes, trash bags
- Basic tools (scissors, tape, glue, markers, brushes)
- Project blanks (mugs/totes/frames/canvases)
- Drying area + name labels
- Light snacks and drinks
- Music + cozy lighting
13) Reuse This Every Time (Your Craft Night Kit)
Keep a bin stocked so hosting is plug-and-play:
- Table cover, wipes, paper plates/cups, paper towels
- Tape, glue sticks, mini hot glue gun + sticks
- 2–3 scissors, markers, paint pens, mixed brushes
- Mod Podge, ruler, pencil, eraser
- Painter’s tape + permanent marker (for names)
- Small fan (drying) + extension cord
- Clear zip bags for guests to carry home projects
14) Fast Ideas by Mood (Pick One and Go)
- Cozy: candle tins, knit-look clay ornaments, warm playlist
- Clean & Minimal: monochrome tote designs, line-art postcards
- Romantic: pressed-flower frames, soft pinks and metallics
- Bold & Fun: neon paint pens on black notebooks, washi-tape art
- Naturey: leaf prints, jar terrariums (moss + pebbles), wood slices
15) At-a-Glance Checklist
- Pick theme + guest count
- Buy/collect blanks & basic tools
- Cover table + set stations
- Prep drying zone + labels
- Snacks/drinks on separate surface
- Playlist ready
- Welcome spiel (what we’re making, where to dry, when we’ll photo)
- Group photo + quick tidy
- Pack leftovers into the Craft Night Kit
Quick FAQ: Craft Night Basics for Beginners
Q: How long should a craft night last?
A: Around 2–3 hours is perfect. That gives everyone enough time to arrive, settle in, craft, and chat without getting tired or rushing through their projects. If you’re hosting on a weeknight, keep it closer to two hours and offer pre-set stations or quick crafts.
Q: What’s the easiest craft to start with?
A: Anything that doesn’t require measuring, precision, or long drying times. Decorating mugs, painting tote bags, making sugar scrubs, or creating vision boards are all great starter projects. They’re easy, forgiving, and fun to personalize.
Q: How many people should I invite to my first craft night?
A: Four to six guests is the sweet spot. It’s big enough to feel lively but small enough that you can manage supplies, space, and conversation easily. Once you get the hang of it, you can scale up!
Q: What if my friends say they’re “not crafty”?
A: Pick beginner-proof projects (like decorating pre-cut items or using stencils), and remind everyone this isn’t an art class—it’s just creative time together. Keep the atmosphere low-pressure and focus on fun, not perfection.
Q: What should I wear?
A: Anything comfortable that you don’t mind getting a little paint or glue on. Encourage guests to do the same. You can even offer disposable aprons or have old T-shirts available for anyone worried about their outfit.
Q: Can I host a craft night in a small space?
A: Definitely! Use your kitchen table, floor picnic-style setup, or even TV trays if you’re short on space. Just protect surfaces with a plastic or kraft paper cover. You can also choose less-messy crafts like jewelry-making, paper crafts, or fabric painting.
Q: Do I need to provide food or drinks?
A: Yes, but keep it simple. Think bite-sized snacks, chips, cookies, or fruit trays—nothing greasy or messy. Drinks like sparkling water, lemonade, or wine (if you’re comfortable serving it) make it feel festive without being complicated.
Q: How do I keep costs down when hosting?
A: Ask everyone to bring one supply or snack, use what you already have at home, and focus on crafts that don’t require specialized tools. Dollar stores, Five Below, and bulk packs on Amazon are gold for hosting on a budget.
Q: How can I keep everyone organized?
A: Create small supply stations (scissors/glue/markers in bins), set up a drying zone, and label everyone’s projects with tape and a marker. You’ll save yourself a ton of cleanup time later.
Q: What if I don’t finish my project?
A: Totally fine! Craft night isn’t about perfection—it’s about creativity and connection. Encourage guests to take unfinished pieces home and keep a little baggie ready for extras (ribbons, stickers, or glue dots) so they can wrap it up later.
Q: Can kids or teens join in?
A: Absolutely—just choose projects that are age-appropriate and low-heat (no hot glue for little ones). Keep sharp tools out of reach and consider hosting a separate “kids’ table” if you want a quieter adult zone.
Q: What’s one thing every host forgets?
A: Trash bags and paper towels! They’re the unsung heroes of craft night. Keep extras nearby, and your cleanup will be 10 times easier.
Ready to make it even easier (and cheaper)? If you loved this guide on what to do, bring, and expect, you’ll want to check out How to Host a Craft Night on a Budget (No Fancy Supplies Required) — it’s packed with smart ways to keep the fun without the big spend.