This post contains affiliate links, which means I may earn a small commission if you purchase through them — at no extra cost to you. I only recommend products I personally use and love.
Tips for Hosting a Stress-Free Craft Night
Want to enjoy your craft night without the chaos? Here are a few tried-and-true tips to help things go smoothly (and keep the glitter explosions to a minimum):
Prep Materials in Advance
Cut cords, organize beads, separate paint colors—whatever you can prep beforehand will save you stress during the party.
I like setting up everything on a foldable craft table like this one so there’s plenty of room for supplies and snacks. Plus, it folds up easily when the party’s over.
If you’re working with a smaller space (or budget), this compact folding activity table is a total win—lightweight, affordable, and easy to stash away after everyone’s gone home.
Limit to 1–2 Craft Options
Pick one or two craft projects max unless you’re hosting an all-day retreat. It keeps the table organized and helps guests focus on finishing something they love.
Create a Drying Area
Set up a drying zone for anything involving paint, resin, or glue so finished pieces can dry safely without being touched or spilled on.
Use Washi Tape to Label Projects
Each guest can label their tumbler, canvas, or floral arrangement with a cute strip of washi tape. It’s adorable and practical for cleanup.
Provide Aprons or Smocks
Even if it’s just oversized button-ups or dollar store aprons, your guests will appreciate not getting paint on their cute outfits.
Keep Wipes and Trash Bags Handy
Crafting can get messy fast. Have baby wipes, paper towels, and mini trash bins on each end of the table.
Ready to get your DIY on?
Whether you’re gathering with your besties for a chill girls’ night or hosting a craft-and-wine soirée, these 25 creative craft night ideas will have everyone laughing, bonding, and leaving with something fabulous.
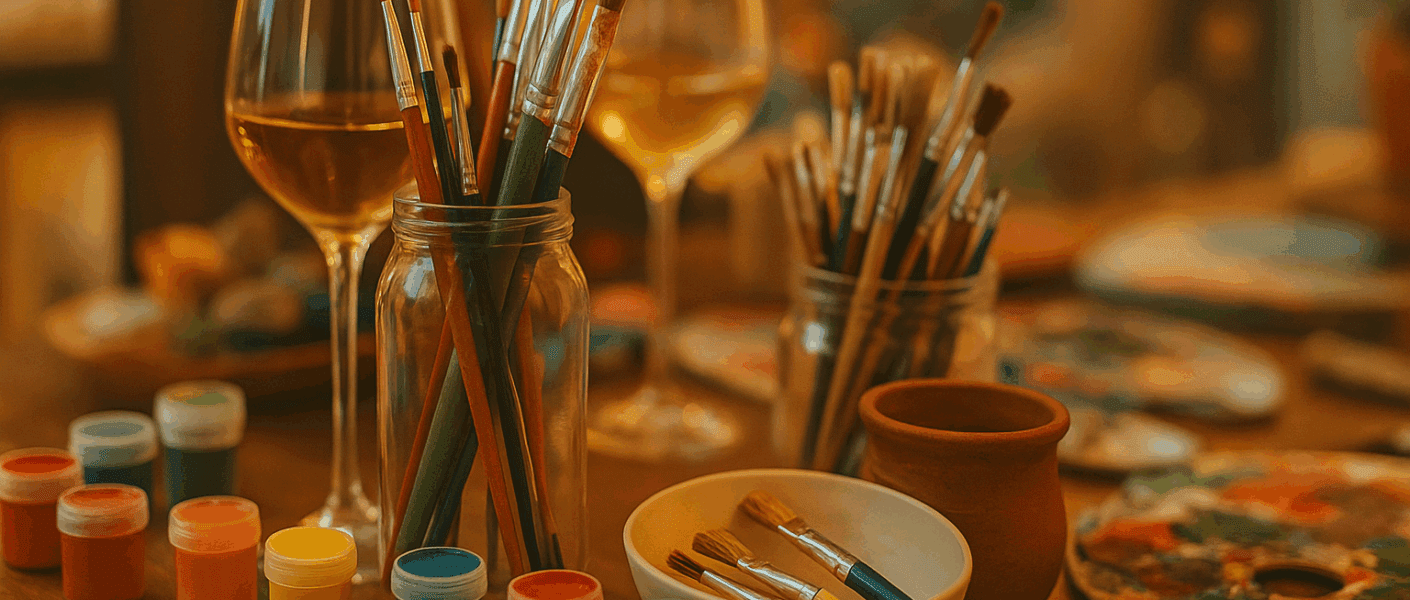
1. Paint & Sip (With a Twist!)
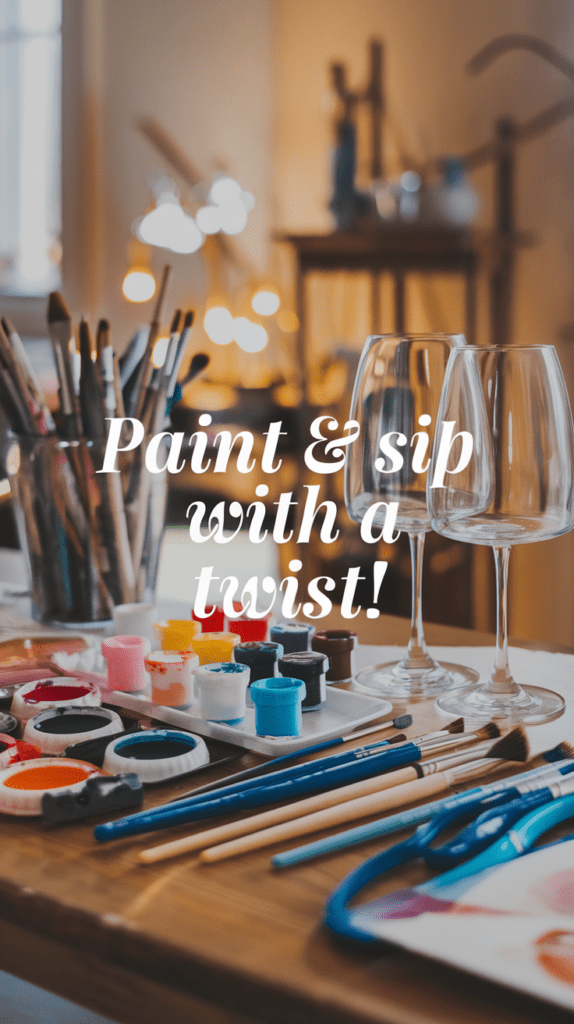
Forget traditional canvas painting—try painting wine glasses, tote bags, or flower pots instead! Set up a station with acrylic paints, brushes, and stencils.
Bonus: Your guests leave with a unique, hand-painted keepsake.
Supplies:
Pro Tip: Cover tables with disposable craft tablecloths to make cleanup a breeze.
How to Make It (Step-by-Step):
- Cover tables with protective cloths and lay out all paint supplies.
- Give each guest a wine glass, tote bag, or small pot to decorate.
- Offer stencils or inspiration printouts for those who want design help.
- Use acrylic paints and let creativity flow.
- Set aside finished pieces to dry on parchment paper or drying racks.
Visualize It:
Imagine a cozy table with drinks in hand, paintbrushes swirling, and a rainbow of painted wine glasses drying beside cheese boards.
Don’t Miss: How to Host a Craft Night on a Budget (No Fancy Supplies Required)
2. DIY Scented Candles

Nothing sets the mood like a homemade candle! Provide soy wax, essential oils, wicks, and cute jars. Let your guests mix and match scents to create their signature candles.
Supplies:
- Soy wax flakes
- Candle jars or mugs
- Wicks
- Essential oils or fragrance oils
- Stir sticks & a melting pot
- Wick holders or clips
Melt your wax in a double boiler like this one and add 1 oz of fragrance per pound of wax.
How to Make It (Step-by-Step):
- Prepare your jars by securing wicks with glue or wick stickers.
- Melt soy wax in a double boiler, stirring occasionally.
- Remove from heat and stir in fragrance oil (1 oz per 1 lb of wax).
- Pour the wax into jars slowly, keeping the wick centered.
- Let candles cool for several hours.
- Trim the wick and decorate the jars with labels, twine, or charms.
Visualize It:
Think flickering candles in pastel jars, a dreamy scent, and soft tunes playing in the background.
3. Boho Macramé Wall Hangings
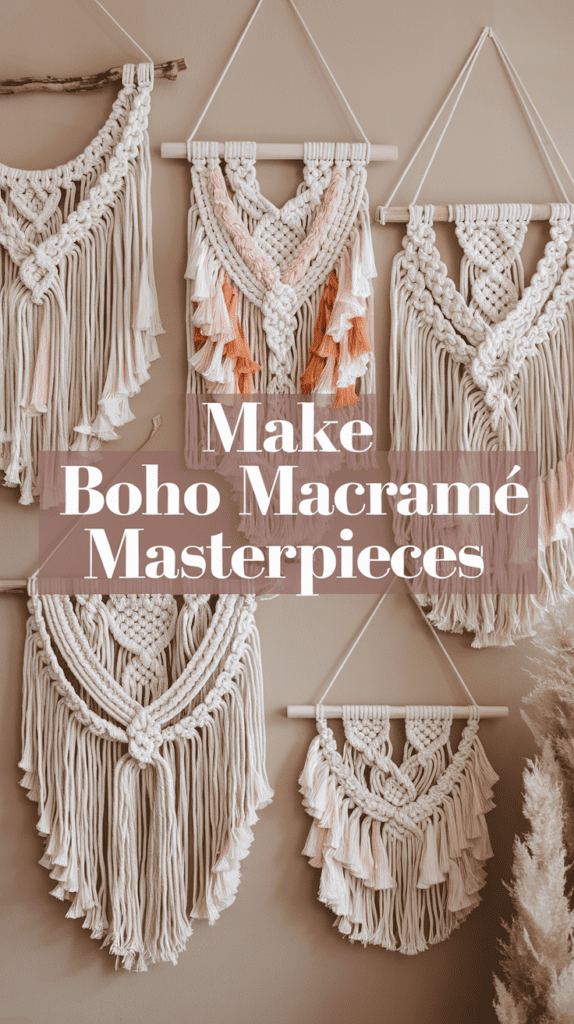
Macramé is easier than it looks! Have pre-cut cords ready, follow a beginner-friendly pattern, and soon everyone will have a gorgeous boho-chic piece to take home.
Supplies:
- Cotton macramé cord
- Wooden dowels or rings
- Scissors
- Basic macramé knot instructions
- Measuring tape or ruler
Pro Tip: I love using a macramé starter kit like this!
How to Make It (Step-by-Step):
- Cut cords to equal lengths (typically 3–4 ft per cord, depending on design).
- Attach cords to dowel with lark’s head knots.
- Follow a beginner pattern using square, spiral, or half-hitch knots.
- Continue knotting until the piece reaches the desired length.
- Trim the fringe and shape it into a V or diagonal cut.
Visualize It:
Boho cords hanging off dowels, in soft neutrals or pastel pinks, with Pinterest-worthy knots and fringe.
4. Polymer Clay Jewelry
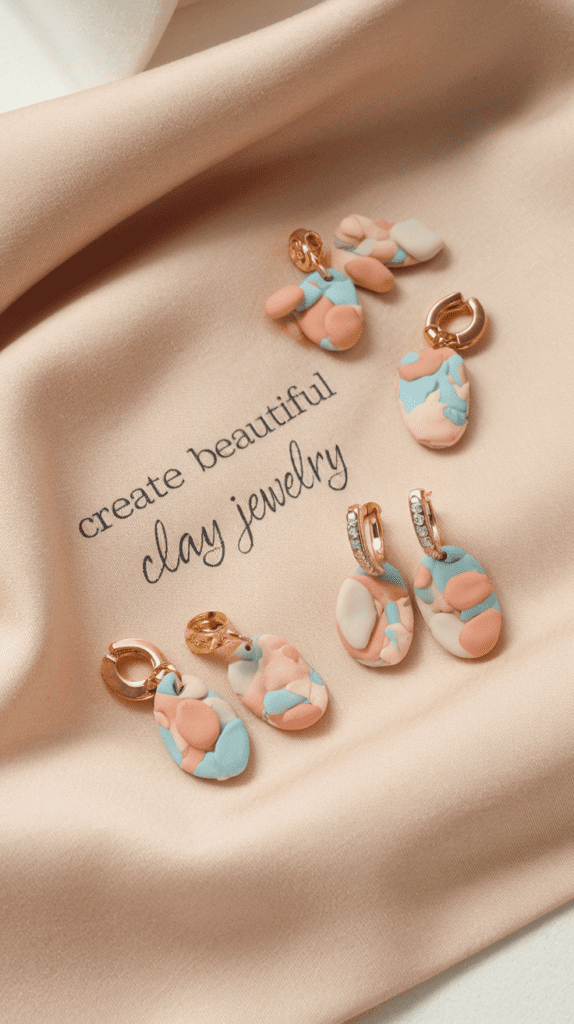
Give your friends a crash course in clay crafting! Offer different colors of polymer clay, rolling tools, and cutters to make earrings, rings, and pendants.
Supplies:
- Colorful polymer clay
- Clay cutters or small cookie cutters
- Rolling pins
- Earring hooks, jump rings, tools
- Baking tray and parchment paper
Pro Tip: I bake mine on a non-stick mat like this one so the shapes don’t warp—learned that one the hard way.
How to Make It (Step-by-Step):
- Knead and soften clay, then roll flat.
- Use cutters to shape clay into earrings, pendants, or beads.
- Bake according to clay instructions and allow to cool.
- Assemble with jewelry hardware using pliers.
- Optional: add gloss glaze for shine.
Visualize It:
Cute little trays of pastel-colored earrings, marbled clay effects, and dainty gold hardware ready to wear.
5. DIY Floral Arrangements
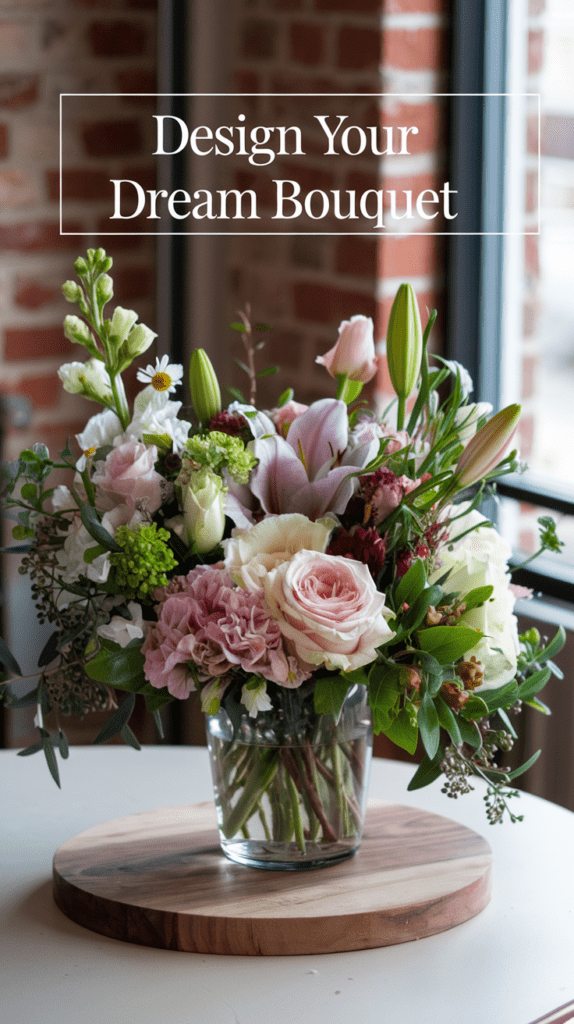
Bring out everyone’s inner florist! Provide a mix of fresh or dried flowers, vases, and floral foam so your guests can design their dream bouquet.
Supplies:
- Fresh or dried flowers
- Vases or jars
- Floral foam or tape
- Scissors or garden shears
- Floral wire and ribbon
How to Make It (Step-by-Step):
- Soak floral foam and place inside vases (if using).
- Trim stems at an angle.
- Start with structural flowers, then add fillers and greenery.
- Rotate the vase as you go for balance.
- Wrap ribbon around the vase or finish with a tag.
Visualize It:
A table full of petals, greens, and stems, with guests posing next to their hand-crafted centerpieces.
6. Custom Embroidery Hoops

Hand embroidery is having a moment! Set up hoops with pre-printed designs (or let guests freehand) and provide colorful threads for a relaxing and artistic experience.
Supplies:
- Embroidery hoops
- Cotton fabric
- Embroidery thread
- Needles & small scissors
- Pre-printed templates or pens to sketch designs
- Needle threaders (optional)
How to Make It (Step-by-Step):
- Secure the fabric tightly in the hoop.
- Sketch or trace a simple design.
- Thread the needle and knot the end.
- Start stitching with beginner-friendly stitches (backstitch, satin).
- Knot off the thread and trim loose ends.
Visualize It:
A calm, focused table with everyone stitching by candlelight, colorful threads laid out in rainbow rows.
7. Personalized Wine Tumblers
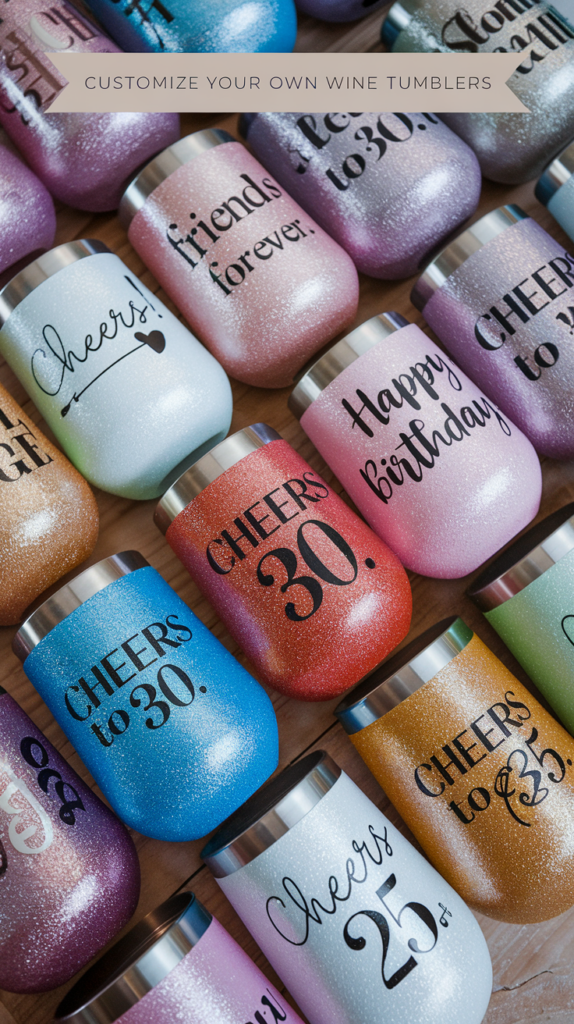
Use vinyl decals, paint pens, or etching cream to customize stainless steel or glass wine tumblers. These make perfect take-home gifts!
Supplies:
- Stainless steel or glass tumblers
- Vinyl decals, paint pens, or etching cream
- Rubbing alcohol & paper towels
- Sealant spray (if using paint pens)
How to Make It (Step-by-Step):
- Clean the tumbler surface with rubbing alcohol.
- Apply vinyl decals or decorate with paint pens.
- Let dry thoroughly (or cure if using etching cream).
- Spray with sealant if needed.
- Display and enjoy your personalized creation!
Visualize It:
A row of glittery tumblers with each guest’s name or favorite quote, perfect for sipping during the party.
8. Decorative Terrariums
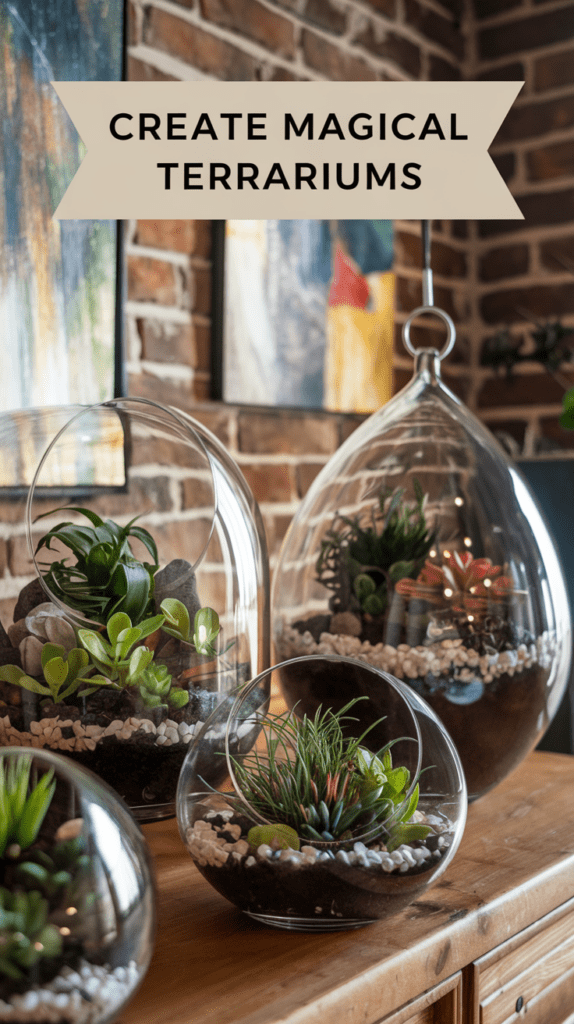
Mini indoor gardens are a hit! Provide glass containers, small succulents, pebbles, moss, and decorative accents so guests can create their own tiny oasis.
Supplies:
- Glass containers
- Small succulents or air plants
- Pebbles, moss, and soil
- Mini figurines (optional)
- Small spoons or tweezers for arranging
How to Make It (Step-by-Step):
- Layer pebbles, then soil and moss.
- Add succulent or air plant.
- Decorate with figurines or tiny stones.
- Mist lightly and avoid overwatering.
- Place near indirect sunlight.
Visualize It:
Chic little glass bowls filled with green life and sparkle, lined up like a Pinterest dream.
9. Resin Coasters or Keychains
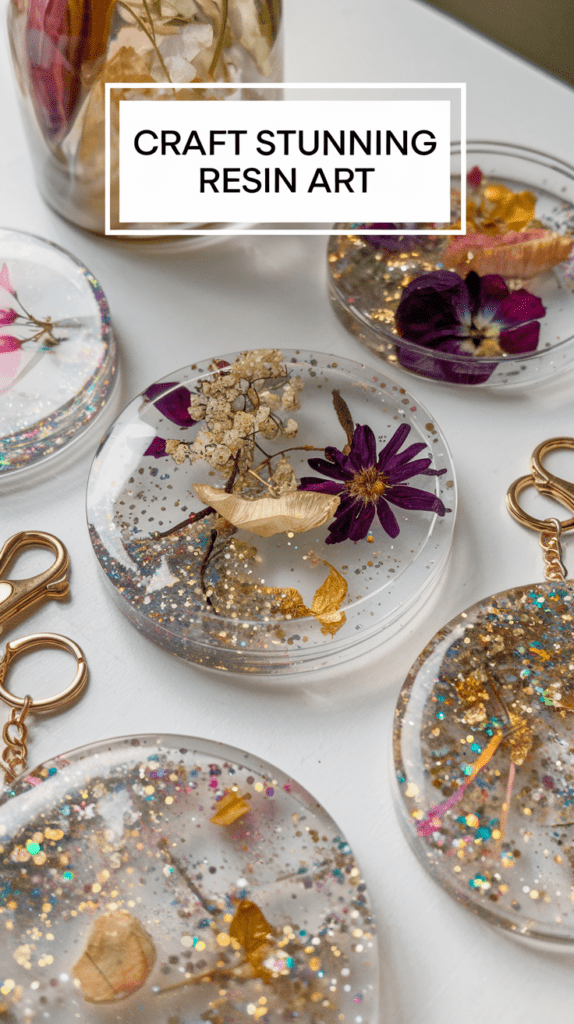
Resin crafts are stunning!
Have silicone molds, resin, glitter, dried flowers, and gold flakes on hand for a fun and trendy DIY.
Supplies:
- Epoxy resin & hardener
- Silicone molds
- Dried flowers, glitter, foil
- Mixing cups, gloves, stir sticks
- Heat gun or toothpick to pop bubbles
How to Make It (Step-by-Step):
- Mix equal parts resin and hardener thoroughly.
- Pour a thin layer into the molds.
- Add decorative elements.
- Top with more resin and pop bubbles.
- Let cure for 12–24 hours.
Visualize It:
Gleaming resin art is full of gold flakes, petals, and shimmer—equal parts craft and glam.
10. Watercolor Art Cards
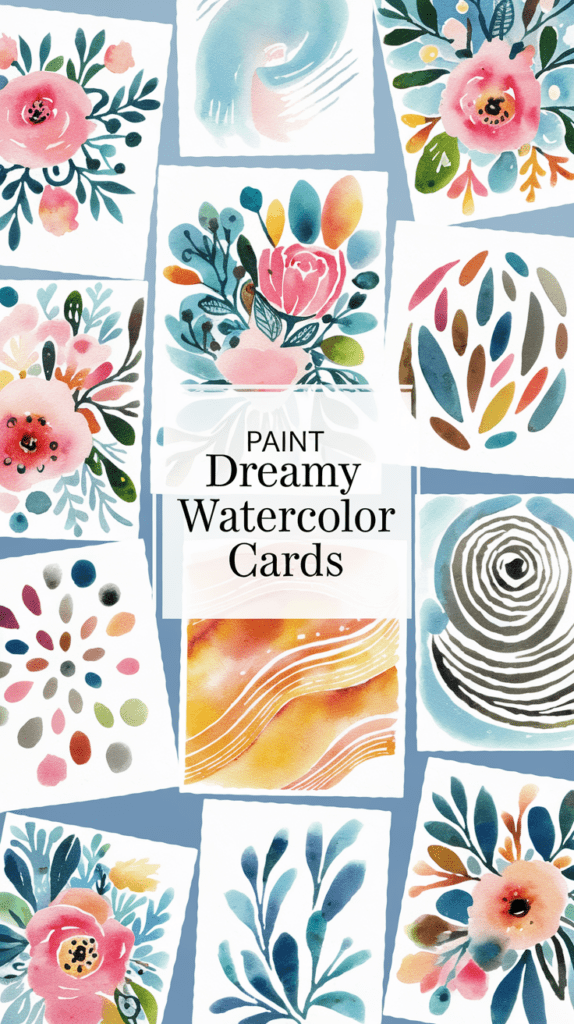
Set up a watercolor station with brushes, watercolor paints, and blank cards. Let everyone create dreamy, artistic greeting cards.
Supplies:
- Watercolor paints & brushes
- Blank watercolor cards or paper
- Water cups & paper towels
- Palettes
- Fineliner pens for detail
How to Make It (Step-by-Step):
- Tape cards to the surface for clean edges.
- Sketch light outlines (optional).
- Paint with watercolors in layers.
- Let dry fully.
- Add details with a pen.
Visualize It:
Soft watercolor swirls, floral shapes, and dreamy cards drying across the table.
11. Hand-Stamped Tea Towels
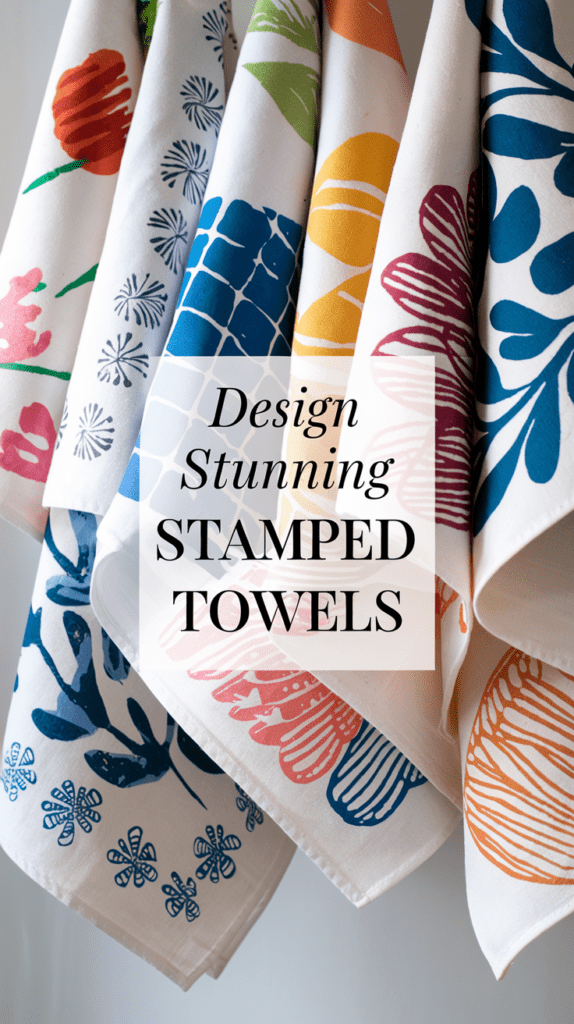
Use fabric paint and fun stamps to transform plain white tea towels into something chic and custom-made. Perfect for gifts!
Supplies:
- Plain white cotton tea towels
- Fabric paint & brushes
- Fun stamps or carved potatoes
- Cardboard inserts
- Iron or dryer to set paint
How to Make It (Step-by-Step):
- Place cardboard inside the towel.
- Apply paint to stamp evenly.
- Press the stamp firmly on the towel.
- Let dry, then heat-set with iron.
- Fold or hang to display.
Visualize It:
Freshly painted towels with lemons, florals, or geometric prints lined up to dry on chairs.
12. DIY Beaded Bracelets
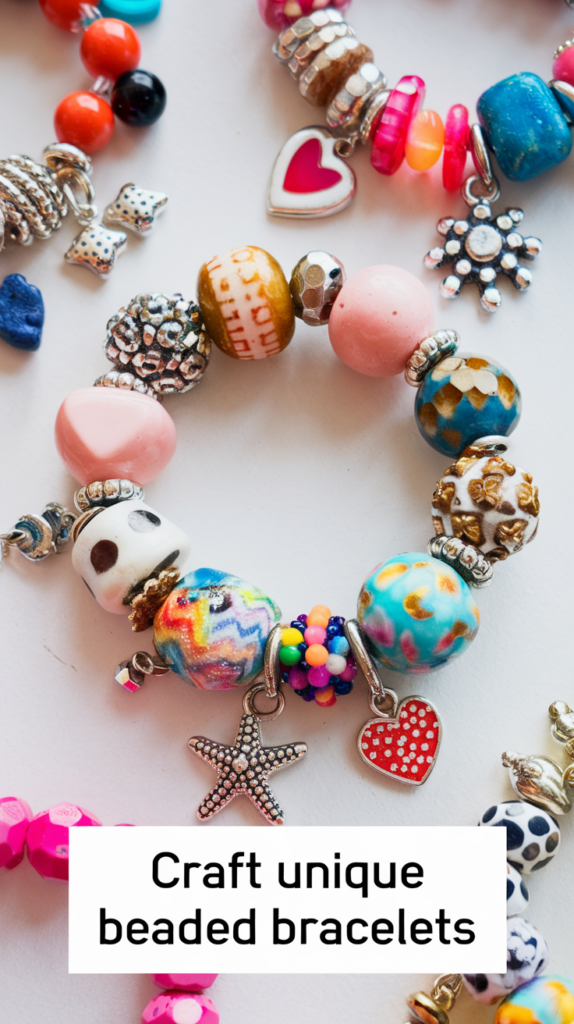
A throwback to childhood friendship bracelets—only more sophisticated! Provide an assortment of beads, charms, and elastic string for unique jewelry creations.
Supplies:
- Assorted beads
- Elastic cord
- Scissors
- Bead stoppers or tape
- Super glue or crimp covers
How to Make It (Step-by-Step):
- Cut the cord to fit the wrist plus 2 inches.
- Tape one end or use a stopper.
- String beads in your pattern.
- Tie a surgeon’s knot and add glue.
- Let dry and trim excess.
Visualize It:
Tiny bowls of colorful beads and everyone trying on their new sparkly stacks.
13. Holiday or Seasonal Wreaths
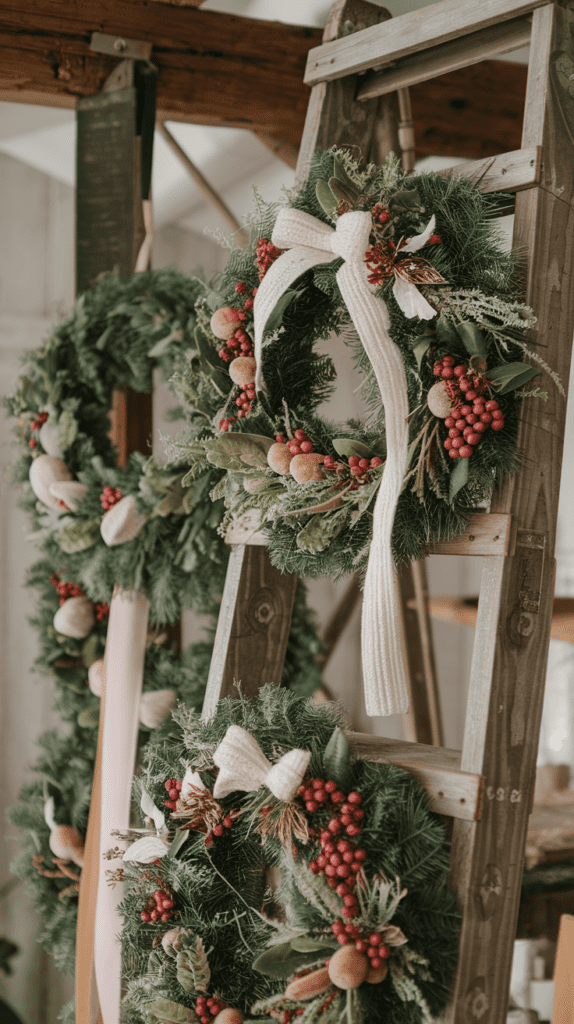
Give guests a head start on decorating with a DIY wreath project!
Offer grapevine or wire wreath bases, faux flowers, ribbons, and embellishments for a festive touch.
Supplies:
- Grapevine or wire wreath base
- Faux greenery or florals
- Hot glue gun
- Seasonal decor like ribbons, ornaments, or mini pumpkins
- Wire cutters
How to Make It (Step-by-Step):
- Plan out your design and layout.
- Attach greenery using wire or glue.
- Add focal items like bows or seasonal pieces.
- Layer textures for fullness.
- Hang with ribbon or door hook.
Visualize It:
There are tables full of faux leaves, cranberries, and ribbons—and everyone proudly holds their custom wreaths.
14. Scrapbooking or Vision Boards
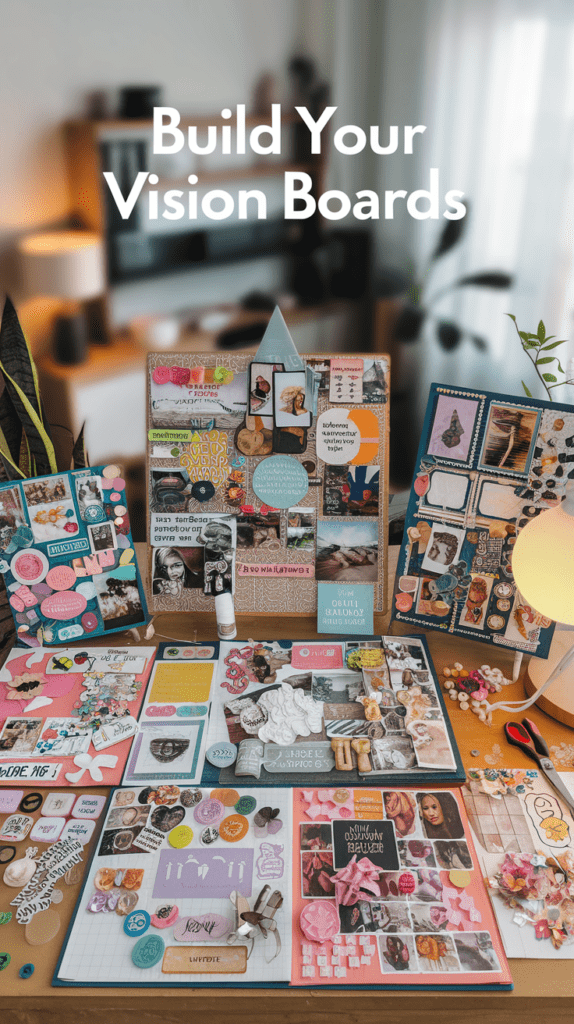
A little nostalgia, a little manifesting—let guests create a scrapbook page or vision board with printed photos, stickers, and washi tape.
Supplies:
- Magazines, scissors, glue sticks
- Poster board or scrapbook paper
- Stickers, washi tape, markers
- Photos or quotes printed in advance
How to Make It (Step-by-Step):
- Flip through magazines and cut inspiring images.
- Sort and group cutouts by theme.
- Arrange on board before gluing.
- Decorate with stickers, tape, and notes.
- Hang or display your vision.
Visualize It:
Creative chaos—magazine clippings flying, laughter over quotes, and colorful boards reflecting everyone’s dreams.
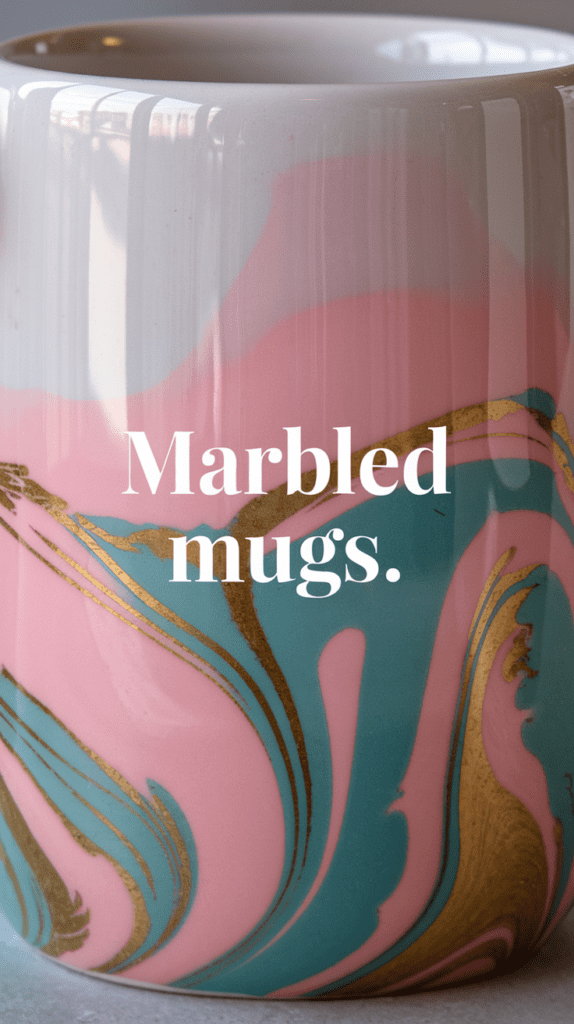
15. DIY Marbled Mugs
Supplies:
- Plain white ceramic mugs
- Nail polish in various colors
- Disposable container filled with warm water
- Toothpick or skewer
- Gloves and paper towels
How to Make It (Step-by-Step):
- Fill a disposable container with warm water.
- Add 2–3 drops of different nail polish colors to the water.
- Use a toothpick to swirl the colors together.
- Dip the mug slowly into the water, letting the polish wrap around the surface.
- Let dry thoroughly, then hand wash only.
Visualize It:
Bold, abstract swirls of pink, teal, and gold decorating the bottom half of a glossy white mug—one-of-a-kind.
Troubleshooting Tips:
- If the polish sinks and the water is too cold—reheat it and try again.
- Move quickly after adding polish so it doesn’t harden on the surface.
- Wear gloves to keep your hands polish-free.
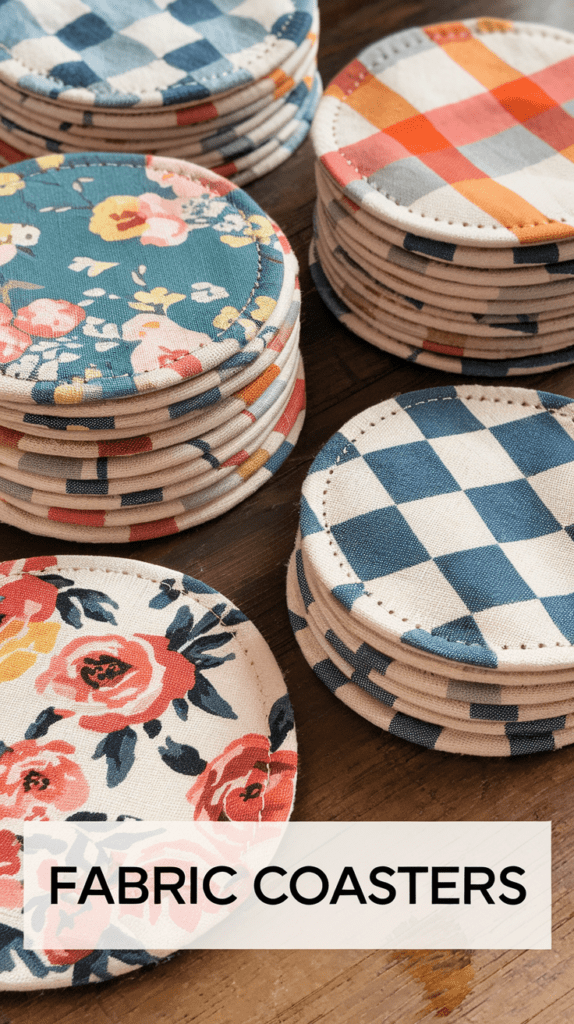
16. DIY Fabric Coasters
Supplies:
- Cotton fabric scraps in cute patterns
- Fusible interfacing or felt backing
- Iron and ironing board
- Scissors or rotary cutter
- Fabric glue or sewing machine
How to Make It (Step-by-Step):
- Cut fabric and interfacing into 4-inch squares.
- Fuse interfacing to the back of each square with a hot iron.
- Pair two squares right sides together, and sew or glue around the edges, leaving a gap.
- Turn right side out, press flat, and topstitch or glue gap closed.
- Optional: add decorative trim or embroidery.
Visualize It:
Stacks of adorable fabric coasters in floral, checkered, or geometric patterns—perfect for wine night or gifting.
Troubleshooting Tips:
- Use pinking shears to reduce fraying.
- If you’re new to sewing, fabric glue works just fine.
- Press seams flat for a polished finish.
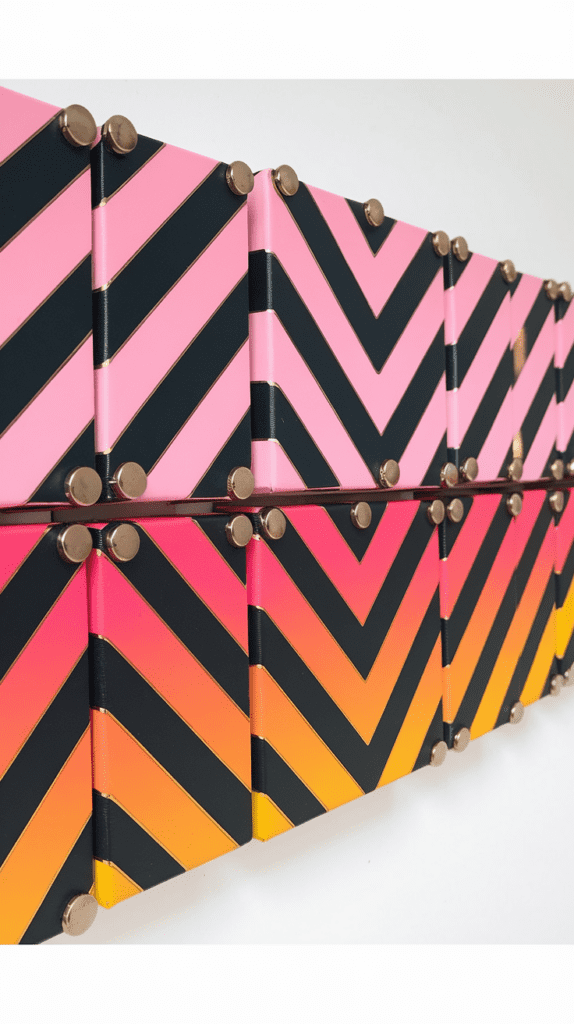
17. DIY Mini Wall Canvases
Supplies:
- Mini stretched canvases (4×4 or 5×5)
- Acrylic paints and paint pens
- Washi tape or painter’s tape
- Stamps or stencils
- Small easels (optional)
How to Make It (Step-by-Step):
- Tape off sections of your canvas for geometric shapes or borders.
- Paint using your desired color palette and let dry.
- Add details with stencils, stamps, or paint pens.
- Remove the tape carefully and touch up any smudges.
- Display on a mini easel or wall hook.
Visualize It:
Bright and bold mini masterpieces—chevron patterns, metallic accents, or quotes—make a perfect gallery wall starter.
Troubleshooting Tips:
- Use minimal water with acrylics to prevent bleeding under tape.
- Let layers dry thoroughly before adding more.
- Practice your design on paper first if free-handing.
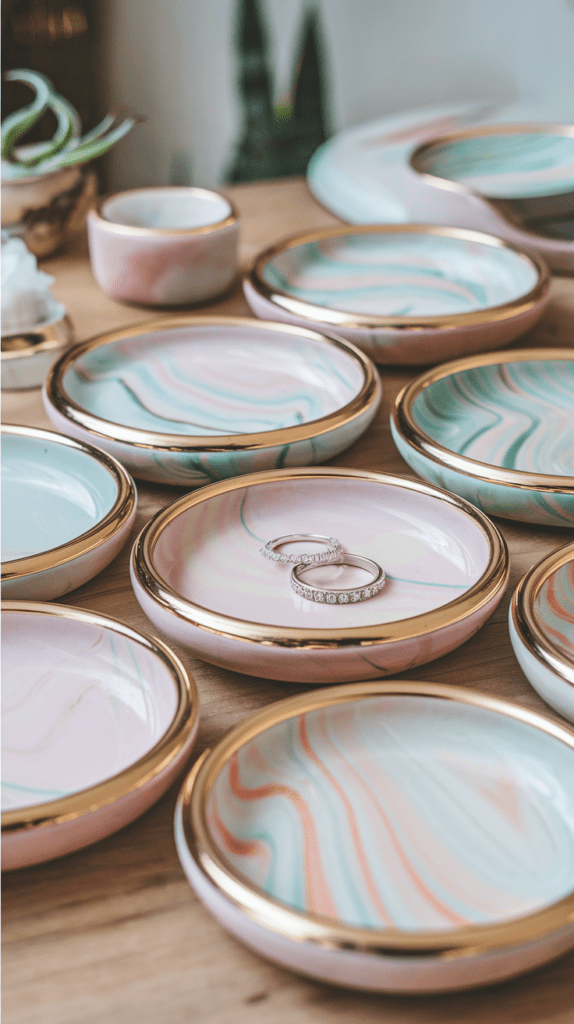
18. DIY Clay Trinket Dishes
Supplies:
- Air-dry clay
- Rolling pin
- Small bowls or ramekins to mold shape
- Acrylic paint and gloss sealer
- Gold paint pen (optional)
How to Make It (Step-by-Step):
- Roll clay to ¼ inch thickness and cut into circles.
- Press gently into a bowl to shape. Let dry for 24–48 hours.
- Remove and smooth edges with sandpaper or a nail file.
- Paint with acrylics or leave natural. Optional: add gold edge.
- Seal with clear gloss and let cure.
Visualize It:
Marbled, pastel, or speckled dishes with shiny gold rims, perfect for rings, earrings, or desk pretties.
Troubleshooting Tips:
- Don’t make the clay too thin—it can crack.
- Let dry thoroughly in the bowl to hold its shape.
- Seal fully if used for damp items like soap.
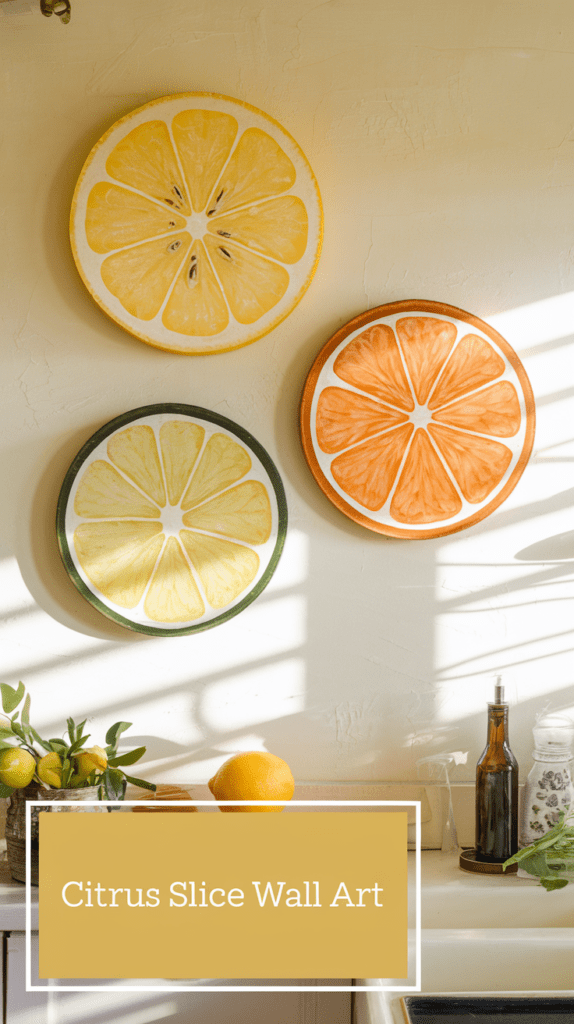
19. DIY Citrus Slice Wall Art
Supplies:
- Small round wooden plaques or foam circles
- Acrylic paint in citrus colors (orange, yellow, lime)
- White paint or paint pen
- Paintbrushes and sponge brushes
- String or sawtooth hangers for mounting
How to Make It (Step-by-Step):
- Paint wooden circles in bright citrus colors and let dry.
- Use white paint or a paint pen to create slice lines (like pie wedges).
- Add small white triangles or segments to mimic real fruit slices.
- Let everything dry completely.
- Attach a string or a hanger to the back and hang it on the wall.
Visualize It:
A trio of citrus slice wall pieces—lemon, lime, orange—hanging in a sunny kitchen or craft room.
Troubleshooting Tips:
- Use a pencil to sketch lines before painting.
- Paint two coats for a vibrant color payoff.
- Use a compass or round stencil for cleaner shapes.
20. DIY Yarn-Wrapped Letters

Supplies:
- Cardboard or wooden letters
- Yarn in various colors
- Hot glue gun
- Scissors
How to Make It (Step-by-Step):
- Start by gluing one end of the yarn to the back of the letter.
- Wrap yarn tightly around the letter, changing colors as desired.
- Add glue as needed to keep it secure.
- Tuck the end under the previous wraps and glue.
- Optional: embellish with mini pom-poms or flowers.
Visualize It:
Monogrammed letters wrapped in chunky yarn with pops of color—ready to hang on a door or prop on a shelf.
Troubleshooting Tips:
- Curved letters? Wrap in short sections and switch directions.
- Use glue sparingly to avoid bumps.
- Try multicolored yarn for a fun gradient effect.
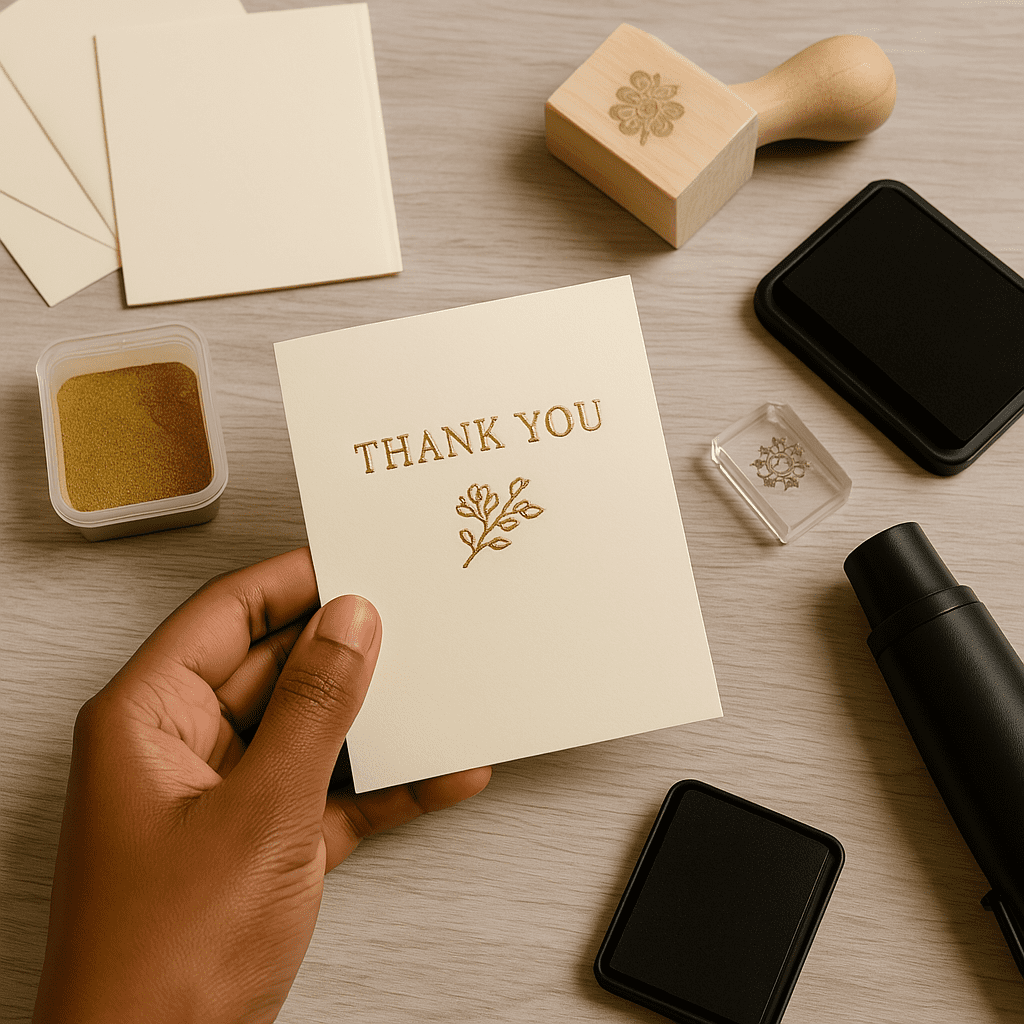
21. DIY Embossed Notecards
Supplies:
- Blank cards and envelopes
- Embossing ink pad
- Embossing powder
- Heat gun
- Rubber stamps
How to Make It (Step-by-Step):
- Stamp your design using embossing ink.
- Sprinkle embossing powder generously, then shake off excess.
- Use a heat gun to melt the powder—it will raise and shine.
- Let it cool and write a note, or leaveit blank for gifting.
- Optional: pair with a handmade envelope.
Visualize It:
Elegant, shiny gold or pastel-embossed cards with floral stamps or initials—look fancy but are DIY.
Troubleshooting Tips:
- Use anti-static powder first to avoid stray flecks.
- Keep the heat gun moving to prevent burning.
- Practice on scrap paper to get the timing right.
22. Painted Canvas Tote Bags

Supplies:
- Blank canvas tote bags
- Fabric paint or fabric markers
- Cardboard insert
- Paintbrushes or sponges
- Stencils (optional)
How to Make It (Step-by-Step):
- Slide cardboard into the bag to prevent bleed-through.
- Sketch or stencil your design.
- Use fabric paint to decorate—florals, quotes, patterns.
- Let dry completely and heat-set with an iron if needed.
- Gift it or use it as your go-to weekend tote.
Visualize It:
Chic canvas bags with hand-painted lemons, leafy greens, or sassy quotes—perfect for farmer’s markets or brunch.
Troubleshooting Tips:
- Use fabric markers for more control with lettering.
- Avoid thick globs of paint—thin coats look better.
- Heat-set per paint instructions to make it washable.
23. DIY Confetti Bookmarks
Supplies:
- Laminating pouches or clear contact paper
- Confetti, glitter, sequins, dried flowers
- Hole punch & ribbon
- Scissors
- Ruler
How to Make It (Step-by-Step):
- Cut pouches or contact paper into bookmark size.
- Add confetti, glitter, or dried flower petals inside.
- Seal and press flat or laminate.
- Punch a hole in the top and thread with ribbon.
- Trim edges clean and gift with a book!
Visualize It:
Clear bookmarks sparkling with rainbow confetti or pressed blooms—adorable, giftable, and functional.
Troubleshooting Tips:
- Don’t overfill—less is more, so it stays flat.
- Seal edges well to avoid peeling.
- Use stiff laminate for durability.
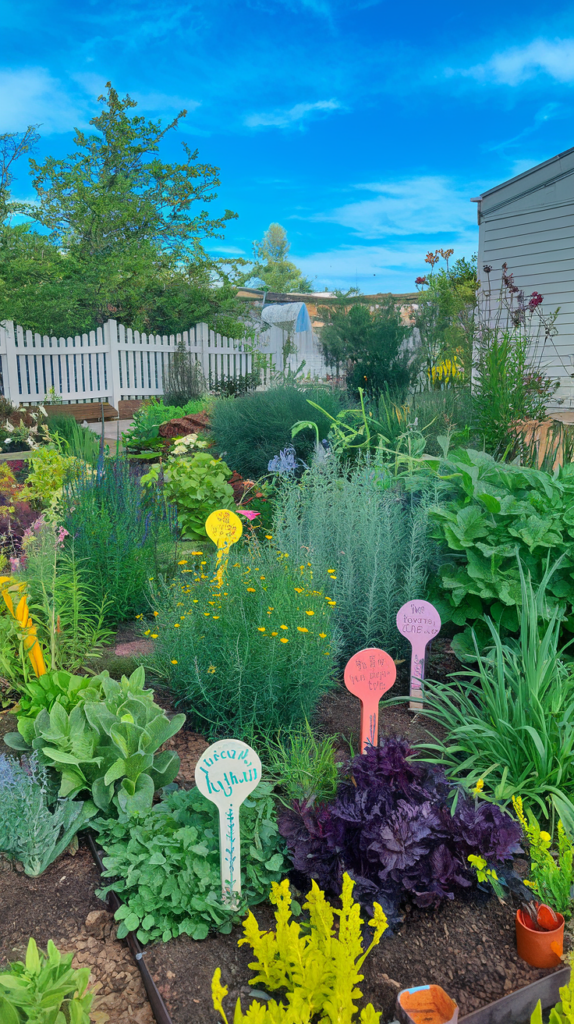
24. DIY Painted Plant Markers
Supplies:
- Wooden popsicle sticks or craft sticks
- Acrylic paint or paint pens
- Clear sealant spray
- Fine-tip permanent markers
- Optional: small rocks or wooden shapes
How to Make It (Step-by-Step):
- Paint sticks in a base color and let dry.
- Add plant names, quotes, or doodles using paint pens or markers.
- Seal with a clear, waterproof spray.
- Optional: use rocks or wooden pieces for a more rustic look.
- Place in potted plants or garden boxes.
Visualize It:
Colorful garden markers that say things like “Mint,” “Basil,” or “You Grow Girl” nestled into your herb pots.
Troubleshooting Tips:
- Use waterproof pens for lettering.
- Don’t skip sealing if you’ll use them outside.
- Let each paint layer dry fully to prevent smudging.
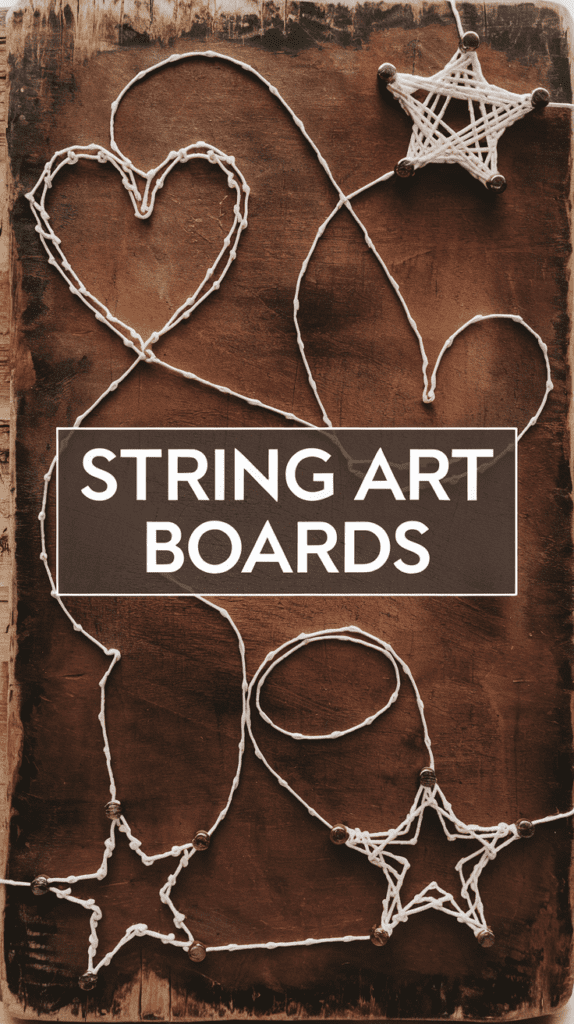
25. DIY String Art Boards
Supplies:
- Small wooden board or plaque
- Nails or tacks
- Embroidery thread or string
- Hammer
- Printed shape templates (heart, star, initials)
How to Make It (Step-by-Step):
- Tape your printed shape to the wood.
- Hammer in nails around the outline, about ½ inch apart.
- Remove the paper and tie the string to one nail.
- Wrap string randomly across nails to fill the shape.
- Tie off and trim excess.
Visualize It:
Rustic wooden boards with white string forming a heart, initials, or starburst—modern, minimal, and so satisfying.
Troubleshooting Tips:
- Choose softer wood to make hammering easier.
- Don’t place nails too close together.
- Use multiple thread colors for an ombré effect.
Make It a Night to Remember!
- Set the mood with cozy lighting, music, and themed snacks.
- Offer a signature cocktail or mocktail to match the vibe.
- Provide cute aprons so no one worries about messes.
- Snap lots of photos to capture the fun (and the final crafts!).
Your craft night will be the talk of the town!
Which idea are you most excited to try? Let me know in the comments!